

Installing sod can quickly transform a bare or neglected yard into a lush, green lawn. However, to get the best results, it’s essential to avoid common mistakes that can spoil your efforts. This guide covers frequent errors made during sod installation and offers practical advice to ensure a successful outcome.
1. Neglecting Soil Preparation
One of the most important steps in installing sod is preparing the soil correctly. Skipping or rushing this step can lead to poor sod growth and health.
Why It Matters: Sod needs a well-prepared soil bed to grow strong roots and thrive. Poor soil preparation can lead to uneven growth, bad drainage, and problems with nutrients.
How to Avoid It: Start by removing all debris, such as rocks, sticks, and old grass. Test your soil to check for pH levels and nutrient needs. Most sod types prefer slightly acidic to neutral pH (6.0 to 7.0). Improve the soil as needed by adding organic material or fertilizer. Finally, till the soil to a depth of about 2 to 3 inches to make it loose and workable.
2. Choosing the Wrong Sod Type
Picking the wrong type of sod for your climate, soil, and sunlight conditions can result in poor growth and maintenance issues.
Why It Matters: Different sod varieties have specific needs and are suited to different climates and soil types. Choosing the wrong one can lead to a lawn that struggles to grow well.
How to Avoid It: Find out which sod varieties are best for your area. Consider factors like sunlight (full sun, partial shade, or full shade), soil type, and climate. For instance, cool-season grasses like Kentucky bluegrass are best for northern climates, while warm-season grasses like Bermuda or St. Augustine work better in southern areas. Consult with a local nursery or gardening expert for advice suited to your conditions.
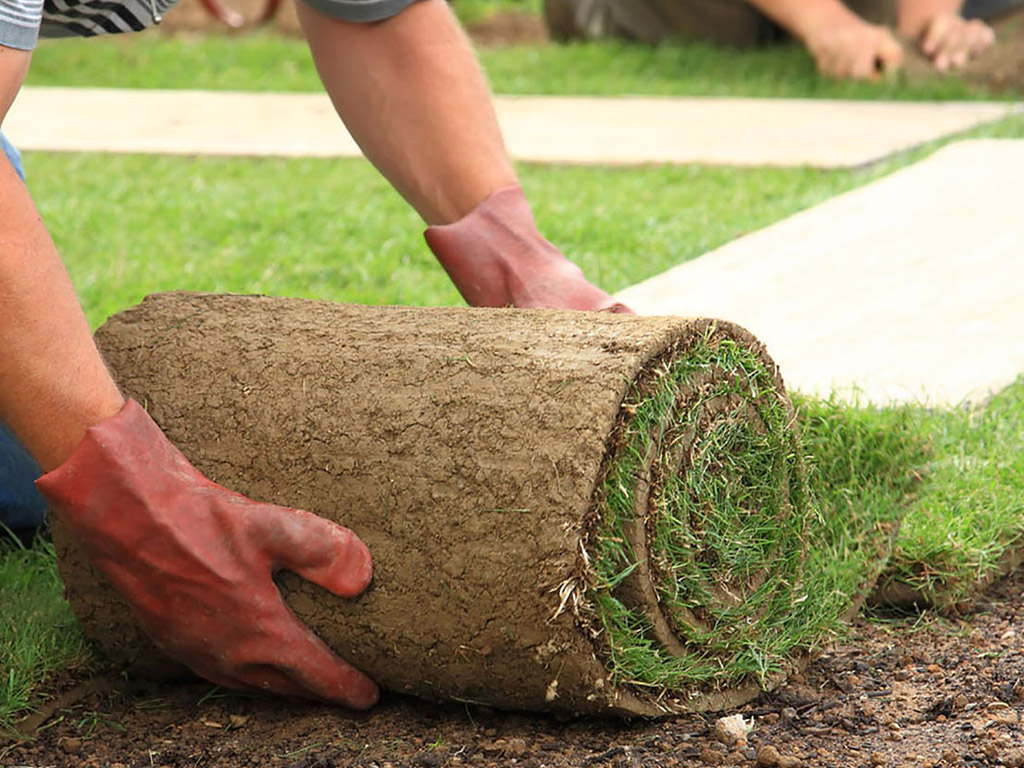
3. Ignoring Proper Sod Placement
Incorrectly placing sod can lead to gaps, overlapping, and uneven growth, affecting the overall look and health of your lawn.
Why It Matters: Proper sod placement ensures even coverage and helps the sod establish a strong root system. Gaps and overlaps can cause poor growth and increase the risk of weeds and pests.
How to Avoid It: Lay sod in a staggered pattern, like bricks, to reduce gaps and overlaps. Make sure the edges of the sod pieces are tightly joined together without spaces. Use a sharp knife to cut and fit sod around edges and corners. Ensure that the sod pieces are level with the surrounding soil to prevent uneven growth.
4. Over or Under Watering
Watering is key to the success of sod installation, but both overwatering and underwatering can cause problems.
Why It Matters: Proper watering helps the sod establish roots and prevents stress. Too much water can lead to root rot and other diseases, while too little water can cause the sod to dry out and fail to establish properly.
How to Avoid It: Water the sod right after installation to a depth of 6 to 8 inches. For the first two weeks, keep the soil consistently moist but not soggy. Gradually reduce the frequency of watering as the sod establishes roots. After this period, water deeply and less often to encourage deep root growth. Aim for about 1 to 1.5 inches of water per week, including rainfall.
5. Skipping the Rolling Process
Rolling sod after installation is often overlooked, but it is important for ensuring good contact between the sod and soil.
Why It Matters: Rolling helps eliminate air pockets and ensures that the sod pieces are firmly in contact with the soil, which promotes better rooting and reduces the risk of uneven growth.
How to Avoid It: Use a roller (available at most garden centers or for rent) to gently press down the sod after installation. Roll the sod in two directions—lengthwise and widthwise—to ensure even contact with the soil. Be careful not to over-roll, as this can compact the soil and hinder root growth.
6. Failing to Fertilize Appropriately
Proper fertilization is essential for a healthy, vibrant lawn.
Why It Matters: Fertilizer provides the nutrients needed for the sod to grow strong roots and thrive. Insufficient or incorrect fertilization can lead to poor growth and health issues.
How to Avoid It: Apply a starter fertilizer designed for new sod, which contains higher amounts of phosphorus to promote root growth. Follow the manufacturer’s instructions for how much to use and when to apply it. Avoid applying fertilizer just before heavy rainfall, as this can cause runoff and nutrient loss.
7. Not Considering Sun and Shade Conditions
Different sod varieties have different light needs. Planting sod in unsuitable light conditions can lead to poor growth and maintenance issues.
Why It Matters: Sod needs the right amount of sunlight or shade to grow well. Planting a variety that doesn’t match your yard’s light conditions can result in a weak, unhealthy lawn.
How to Avoid It: Choose sod varieties that fit the light conditions of your yard. For shaded areas, pick shade-tolerant varieties like fine fescues. For sunny areas, select sun-loving varieties like Kentucky bluegrass or Bermuda grass. Assess the light conditions of your yard and choose sod that will grow well in those conditions.
8. Neglecting to Edge and Trim Properly
Proper edging and trimming are important for the look and health of your new sod.
Why It Matters: Edging and trimming define the boundaries of your lawn and prevent sod from spreading into other areas. Neglecting this step can result in an uneven appearance and potential problems with encroaching grass.
How to Avoid It: Use a sharp edging tool to define the edges of your lawn and keep sod from spreading into flower beds or walkways. Trim any excess sod that overlaps onto non-lawn areas. Regular maintenance, including edging and trimming, will help keep your lawn neat and healthy.
Conclusion
Avoiding these common mistakes can make a big difference in the success of your sod installation. By preparing your soil properly, choosing the right sod type, and following best practices for installation and maintenance, you can achieve a beautiful, healthy lawn. With the right approach, your new sod will flourish and provide a lush, green landscape for years to come.